Printer’s Marks
Have you left printer’s bleed and crop marks?
In printing, artwork is printed on oversized sheets of paper larger than the size of the final document. These are then cropped down to the correct size.
For this reason in order to print artwork correctly your artwork or design document needs to include bleed and crop marks.
Crop marks are a guide for the printer to know where to trim the artwork to make it the correct size once it’s printed.
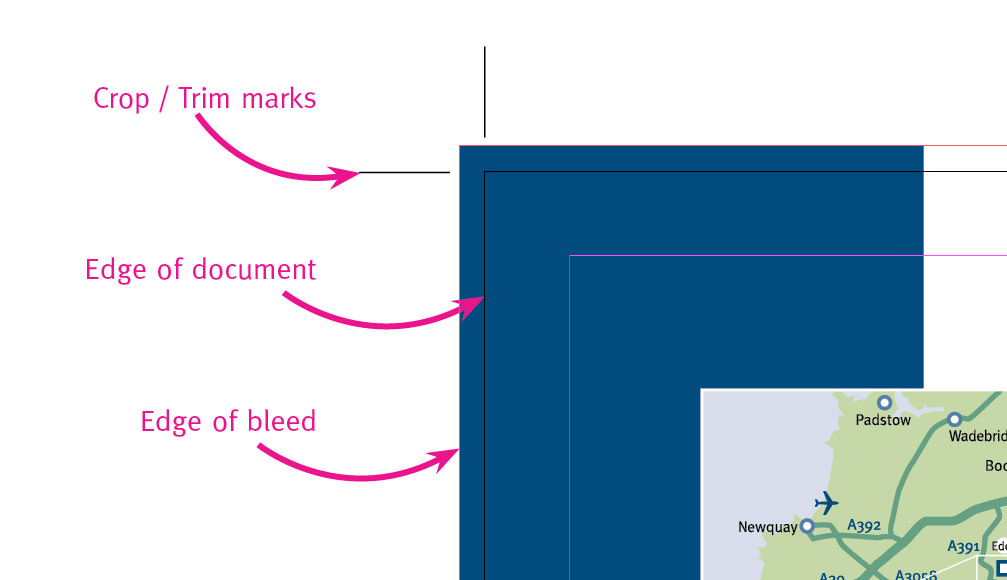
Bleed
Bleed is the area of artwork that extends beyond the dimensions of your printed document. You need bleed to avoid strips of white paper showing on the edge of your print when cut to size.
Any objects touching the edge of your document require bleed. A background colour or image should spread to cover the entire bleed area.
Add a bleed of 3mm for each side of the page or 6mm to the total width and height of the document.
You can add printer’s bleed and crop marks in Publisher, InDesign & Illustrator.
If you’re using Word and Photoshop, you’ll need to make the document slightly oversized to include the 6mm bleed as above but you aren’t able to add crop marks.
If you’re unable to add printer’s marks we can do this for you, simply get in touch with our team.